Construct an Oblique Stereonet
Steven Dutch, Professor Emeritus, Natural and Applied Sciences, University of Wisconsin - Green Bay
Creating an Oblique Stereonet
Method 1
 |
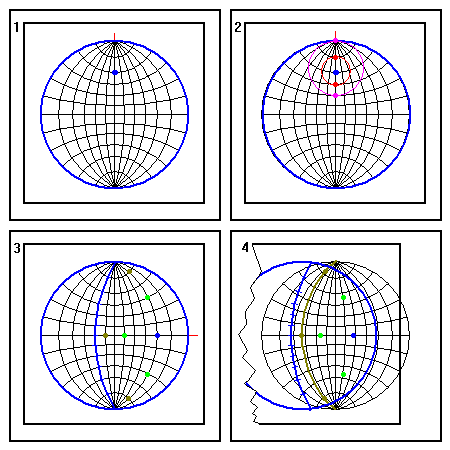
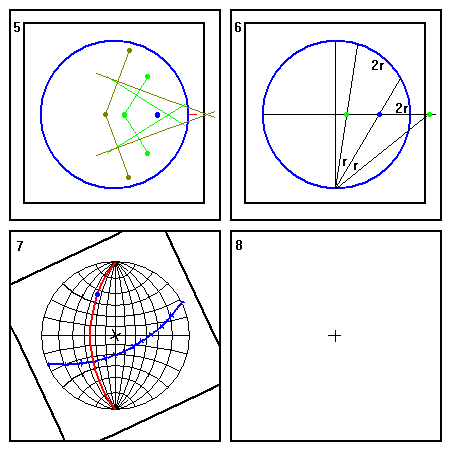
1. Plot the desired location of the pole for the oblique net (blue). Also draw a primitive circle. 2. Small circles that are entirely within the net can be constructed by counting off radii in either direction from the pole and bisecting to find the geometric center of the circle. 3. Larger small circles can be constructed by locating three points on the circle. Rotate the pole to the equator and count off the radius along the equator and the meridian through the rotated pole. While in this orientation, also plot the equator of the oblique net and mark off the angles on it. |
4. A circle is a circle. The circles on the equatorial stereonet can be used as templates. There is no law that says you can't move the overlay off-center to find the right radius circle. But you can only use the circle as a template for drawing - you can't measure angles or do any other calculations by shifting the overlay. Just because two circles on a stereonet have the same radius does not mean the angles will be marked off the same way on the two circles.
 |
Another way to draw circles is to bisect the lines between the three points. The bisectors intersect at the center. As a check, the center must lie on the equator. Finally, you can use the definition of the stereographic projection to construct the diameters of the small circles. To plot great circles, rotate the overlay so the oblique pole and each angle mark on the equator lie on a common great circle. Construct the great circle on the overlay |
Method 2: Rotation
 |
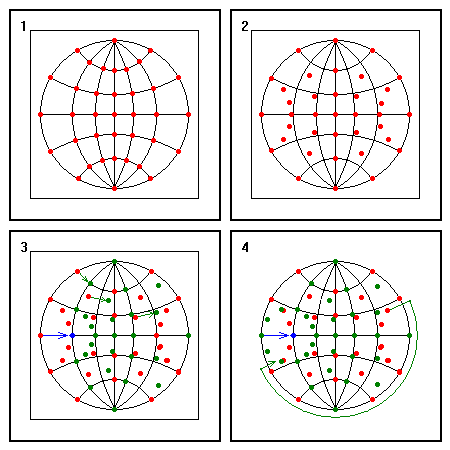
1. On the overlay, mark key intersections of meridians and small circles. 2. Rotate the overlay 90 degrees. 3. Rotate the pole on the overlay to its new position (blue). Rotate all the other intersections the same amount by counting off the rotation along their respective small circles. A few rotations are shown by green arrows. 4. If a rotation carries a point off the net, move to the diametrically opposite point and continue counting inward. One such rotation is indicated. |
 |
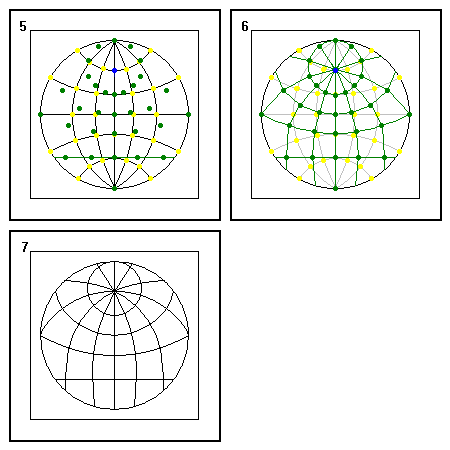
5. Return the overlay to its original orientation (the original points are now shown in yellow). 6. Using any of the construction methods discussed, construct great and small circles through the rotated intersections. There may be some scatter, so use the best fit. 7. Final result. |
Note, as a bit of stereo-trivia, that the bottom-most small circle on the oblique stereonet is a straight line. Every other case we have seen of a straight line on a stereonet has been a vertical great circle.
If a plane cuts the sphere through the projection point, it will cut the projection plane in a straight line. This is obviously what happens for vertical great circles. But if the plane does not pass through the center of the sphere, it will cut the sphere in a small circle. Obviously the small circle will pass through the projection point. So an off-center straight line on a stereonet is a small circle that passes through the projection point. That point on the circle plots at infinity, so the projected small circle is a straight line.
Now That We Have It, What's It Good For?
Oblique stereonets are fairly uncommon. They find some use in rotation problems. If you have to rotate a large number of points around an oblique axis, the construction can be done much more simply using an oblique stereonet.
Return to Course Syllabus
Return to Techniques Manual Index
Return to Professor Dutch's Home Page
Created 6 September 2000, Last Update 12 June 2020